Sub-Licensee Overview of CMS & Analytics
Getting Started
Step 1: Login
Go to www.yogobogo.com and at the top right hand side you will see a login section where you can enter the login details supplied to your account for managing your Hotspot details on your location based mobile marketing app. Note: Ensure that Pop-ups are enabled in your browser.
Lost Password or not Received: If you did not receive or have lost your password it can be retrieved by going to the above page at yogobogo.com then enter some random word or letters and ‘click’ on the login button. This will bring up another page that will prompt you to re-enter your login details. Select the ‘Forgot Password?’ link underneath the ‘Login’ button and enter the registered email for your Hotspot and click on ‘Send Password’ - your login details should now be your email. Note: Check your spam if it is not in your inbox.
Manage Your Digital Marketing Hotspot
Now that you've logged into your account you will see your home screen dashboard - like the screenshot below titled 'Manage my Virtual Guide Hotspot'. Here you can manage all your digital marketing content, offers, promotions, loyalty rewards, photos and/or virtual tour. Along with your proximity marketing campaigns through Beacons and iBeacons you can view and analyze current and past campaigns, customer engagement, subscriptions, usage, habits and more with this powerful CMS & intelligent analytics.

Step 2. Click on the green Add/Edit button under 'Manage my Map Hotspots' which opens up a new page where you can select your Hotspot(s) from a drop down menu - you may have more than one business Hotspot if you have multi locations.
Add/Edit Hotspot Details
You now have a new page open with the title 'Edit Hotspot' - like the screenshot below. From this page you can manage and edit your business description, contact info, social link & web links, pictures, panoramas and/or videos, events, offers, rewards, audio, digital marketing files, push offers and rewards as well as translate your description in up to six other languages. Each of the fields will have a ‘ToolTip’ (small yellow question mark) to guide you and give you instruction.
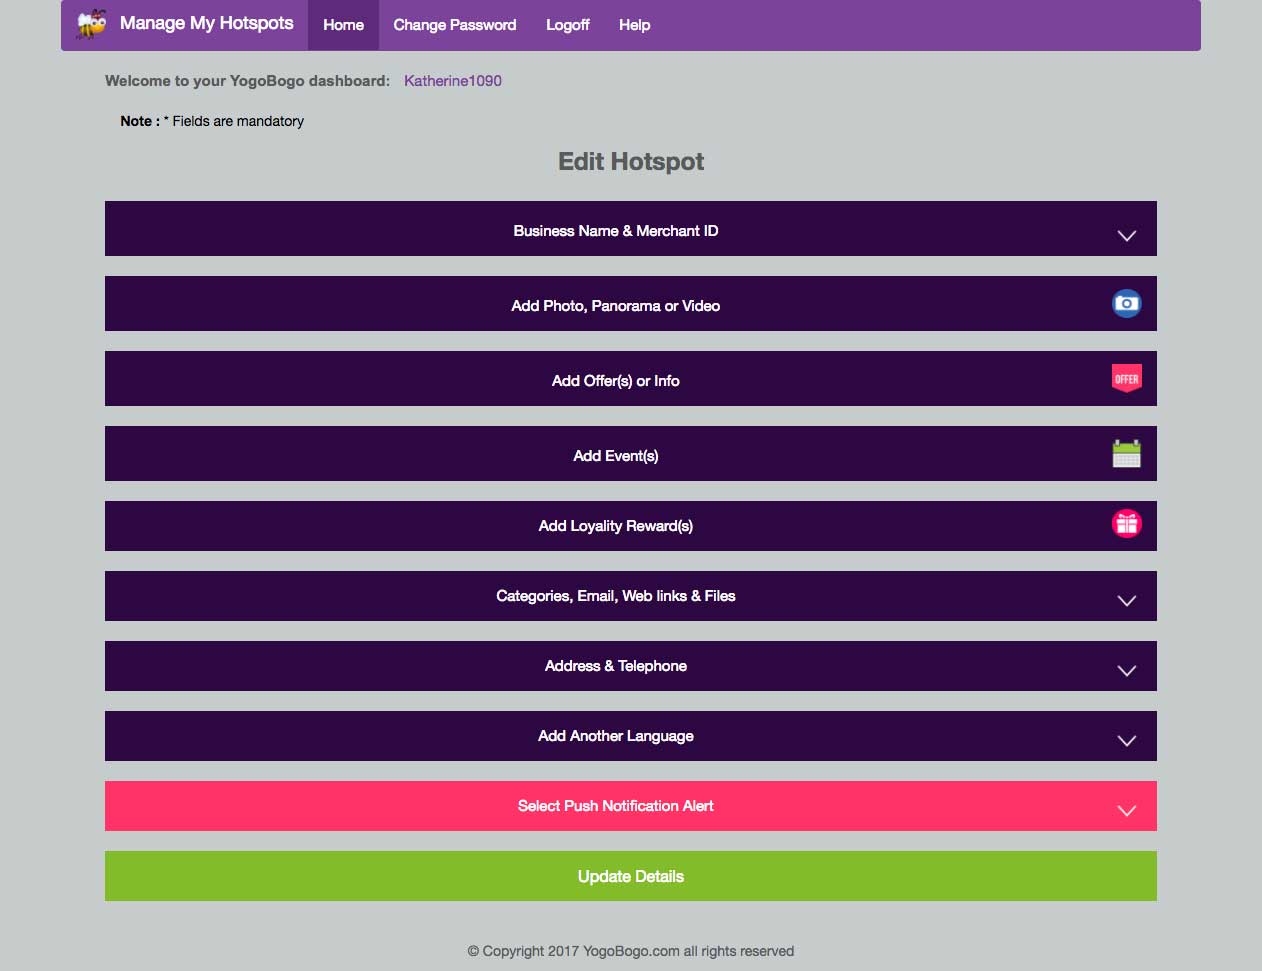
Your ‘Edit Hotspot’ page is split into eight easy to manage buttons which we've listed in order below with brief description. Note: in order for any changes or additions to take effect you must always tap on the ‘Update Details’ button to save & confirm changes.
- Business Name & Merchant ID: This section contains a) your unique Merchant ID which enables you and/or staff to login into your merchant account allowing you to scan & verify loyalty visits through customers QR code profile. Note: You can reset your merchant ID by tapping the green Reset Np. on to top right side of this field. b) HS Title - this is the name of your business, attraction or venue. For best results try to keep it under 35 characters. c) HS Description - this is where you can enter a full description of your business HS, service, attraction or place of interest. d) Meta Tags - enter keywords to help search engines find you through our web based version of the app and e) Additional Search Words - so that users can find your business through internal search engine search
-
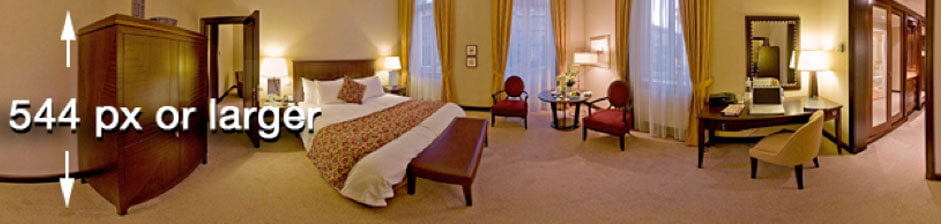
Add Photo, Panorama or Video: This section allows you to upload and manage your photos, panoramas and video. You can choose only one of these 4 options a) Upload Still Photos - for best results they should be in landscape format and cropped to 768 x 544 pixels and saved as .jpg files. They can be bigger than these dimensions and the system will resize to fit so for best results try to crop your photos to size. Note: a max. of 12 photos are allowed to be displayed per HS. b) Upload Panoramas - If you choose to use panoramas to promote your business we support both 180° 0r 360° panoramas. Your panorama should be cropped to a min height of 544 pixels and the length should be well greater than 768 pixels (see picture below). Once you have selected and uploaded your panorama let the application know how to handle the panorama by selecting choose either 180° or 360° picture action. c) Upload Equirectangular Images - Equirectangular images are 360° x 360° panoramas d) Upload Movie - we support the following movie formats .mov, .m4v, .3gp and .mp4 files and up to a max. size of 20 MB's
-
Add Offers or Info: Add one or more Offers and Marketing Message for your loyal and potential customers. In addition to your offer title, description and photo you can also include a web link, PDF print file. finish off by selecting your start and end dates and then tap the 'Submit' button.
- Add Event(s): Add one or more of your Events to promote to your customers and local community and visitors. Include title, description, photo, email, web link, PDF print. Finish off by selecting your start and end dates & times and tap the 'Submit' button
- Add Loyalty Reward(s): Add one or more Loyalty rewards or 'Treasure Hunt/Quest' to engage and increase customer. loyalty and reach new customers. Include Reward title or Quest title, description, photo, PDF file, email, web link, no. of available 'rewards/gifts' , no. of visits required to collect reward/gift, confirm if purchase is required and if the reward continues once user has completed (example you may run an ongoing campaign where you get the 10th coffee for free). Next select your start and end dates and hit the green 'submit' button. Note: if you are creating a Quest, Treasure Hunt or some Geocaching game you can print off and laminate the associated QR code once you've tapped the 'Submit' button to create your offer. These QR codes are geo aware and can only be scanned by the end user within your Hotspot vicinity which adds a level of security against possible cheats.
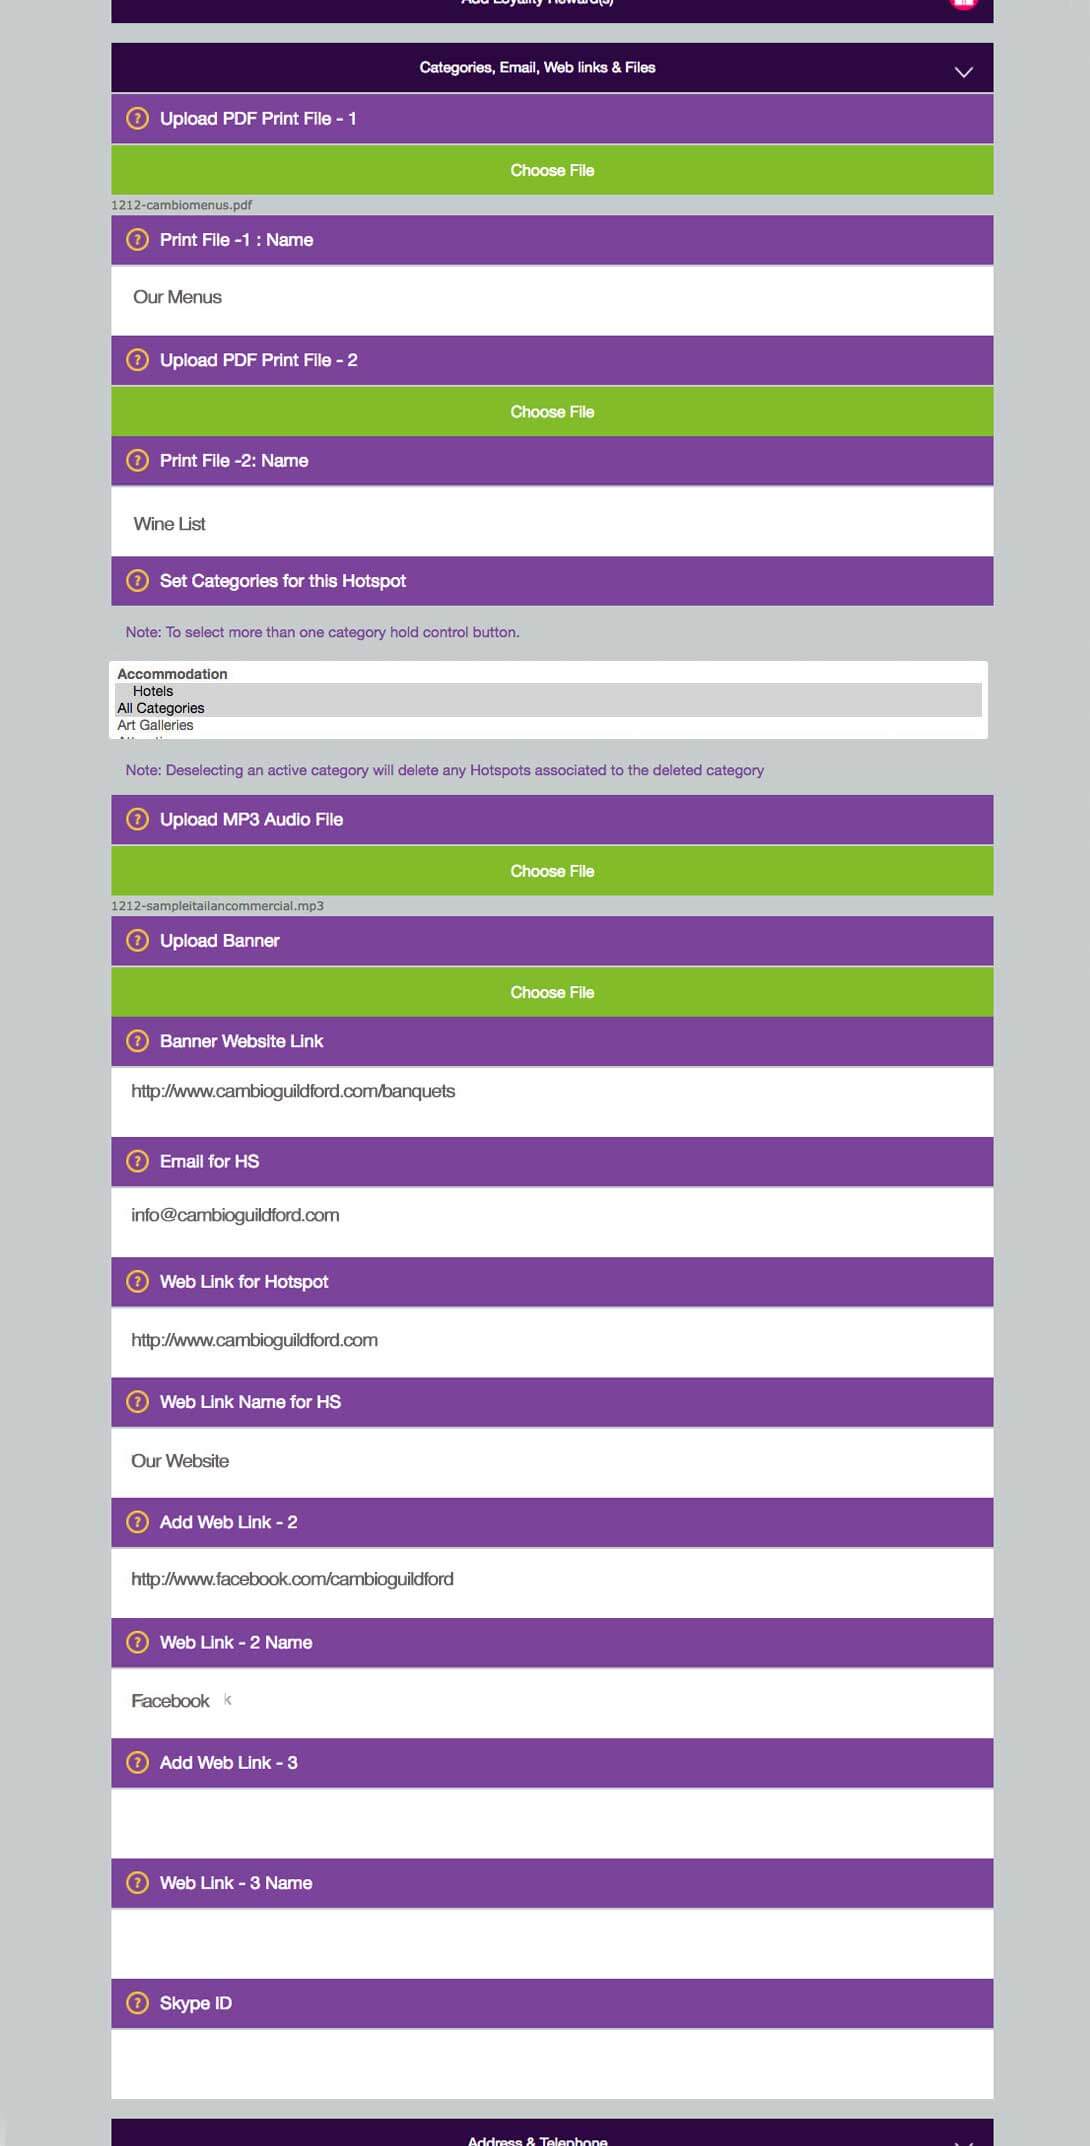
- Categories, Email, Web links & Files: Here you can upload and update a) 'PDF Files' e.g., your PDF menus, brochures & price lists b) select your business Categorie(s) c) Upload an MP3 Audio file d) Upload a promotional Banner and embed a link Note: 1) banner uploads only work if your licensee gives you permission 2) banner size(s) should be 770(w) x 300(h) pixels e) Add your email, web link(s) and Skype id for customers to message or call you
- Address & Telephone: Provide your full contact details, address and tel. number.
- Add Another Language: Translate your business description in the following 6 languages to reach a larger market - French, German, Italian, Portuguese, Russian & Spanish.
- Select Push Notification Alert: Notify subscribed customers that are following you of Offers, Events, Treasure Hunts & Loyalty rewards.
- Update Details: Always ensure you tap on the 'Update Details' button to save and publish your changes and updates.
How to Set-up & Manage your iBeacons & Proximity Campaigns
Tapping on your Add/Manage Beacons opens a window like the screenshot below. In this example there are four Beacons / iBeacons being used to target customers passing through the proximity of the beacon zones. Below we highlight how you set-up your beacons and campaigns in order to use proximity marketing to target your customers with time sensitive messages, promotions & offers when they're likely to make a purchase decision.
Step 1.To begin with just tap on the green '+ Add Beacons' button to add your iBeacon or Beacon.
![]()
Step 2. Fill in all the fields starting off by naming your iBeacon and adding its 32 hexadecimal UUID code and its Major and Minor value Note: The UUID for all your iBeacons will be the same value, and the Major and Minor values will vary for each iBeacon. Now add the beacons pairing code, select the 'Hotspot' that you will be creating the campaigns from, make sure the 'status' is active and click the 'save' button.
![]()
Step 3. On your 'Manage Beacons' admin screen tap the green 'Campaign' button under the actions column. This will open a screen like the one below that enables you to type your Campaign Title and Message. Now set the trigger action and the frequency it delivers it per customer along with the start and end date. If you wish you can also link to any of your current offers, discounts or rewards which will be displayed in the 'Select Offer' dropdown menu. Ensure the 'status' is active and save. Congratulations you have now created your first proximity campaign. Follow the same steps if you want to add further beacons.
To view a report on this campaign just go back to your 'Manage Beacons' admin screen and select 'Report'.
![]()
View real-time Analytics, Customer Shopping Behavior & Measure Current & Historical Campaigns
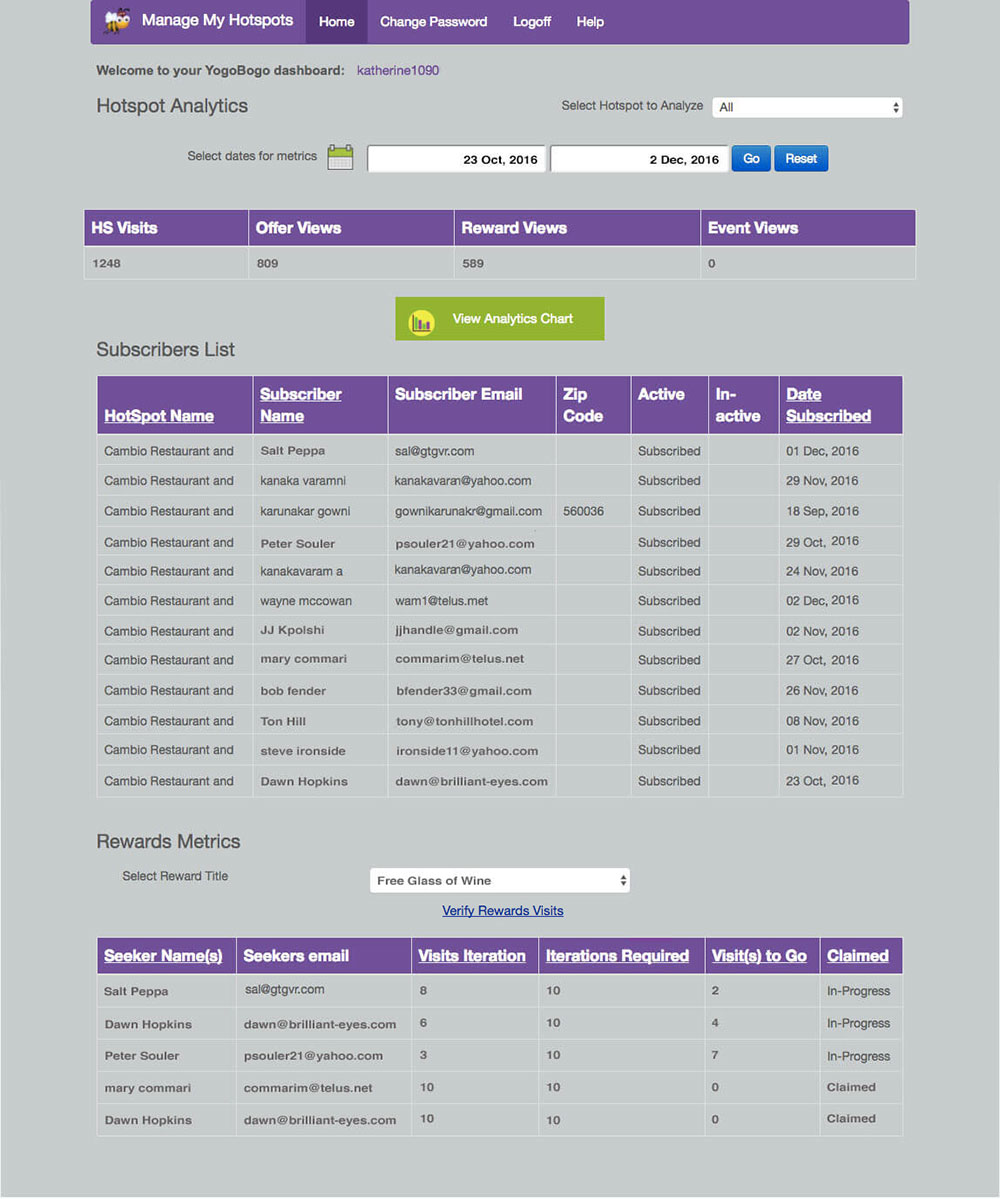
Step 1. Click on 'Visitor Metrics' on your dashboard home page which will open up a window like the one below. There are 3 sections to this page. First select the Date range you wish to view and tap 'Go'.
The 1st section allows you to view the number of HS (Hotspot) views, Offer views, Reward views, and Event views you have posted. Note: Selecting the 'View Analytics Chart' button opens up this above information in graph chart shown under the image below.
The 2nd section is a CRM tool that shows your subscribers list have subscribed to your 'alerts' and displays their name, email & zip code / post code for demographic purposes and shows you the date subscribed and if they are active or not.
The 3rd section displays your Loyalty & Reward metrics. Start off by selecting the Reward title which then shows you all the people that are engaged and visiting through your selected loyalty campaign and the number of visits they have made, visits remaining and whether they have claimed their reward. For further details you can click on the 'Loyalty Report' link.
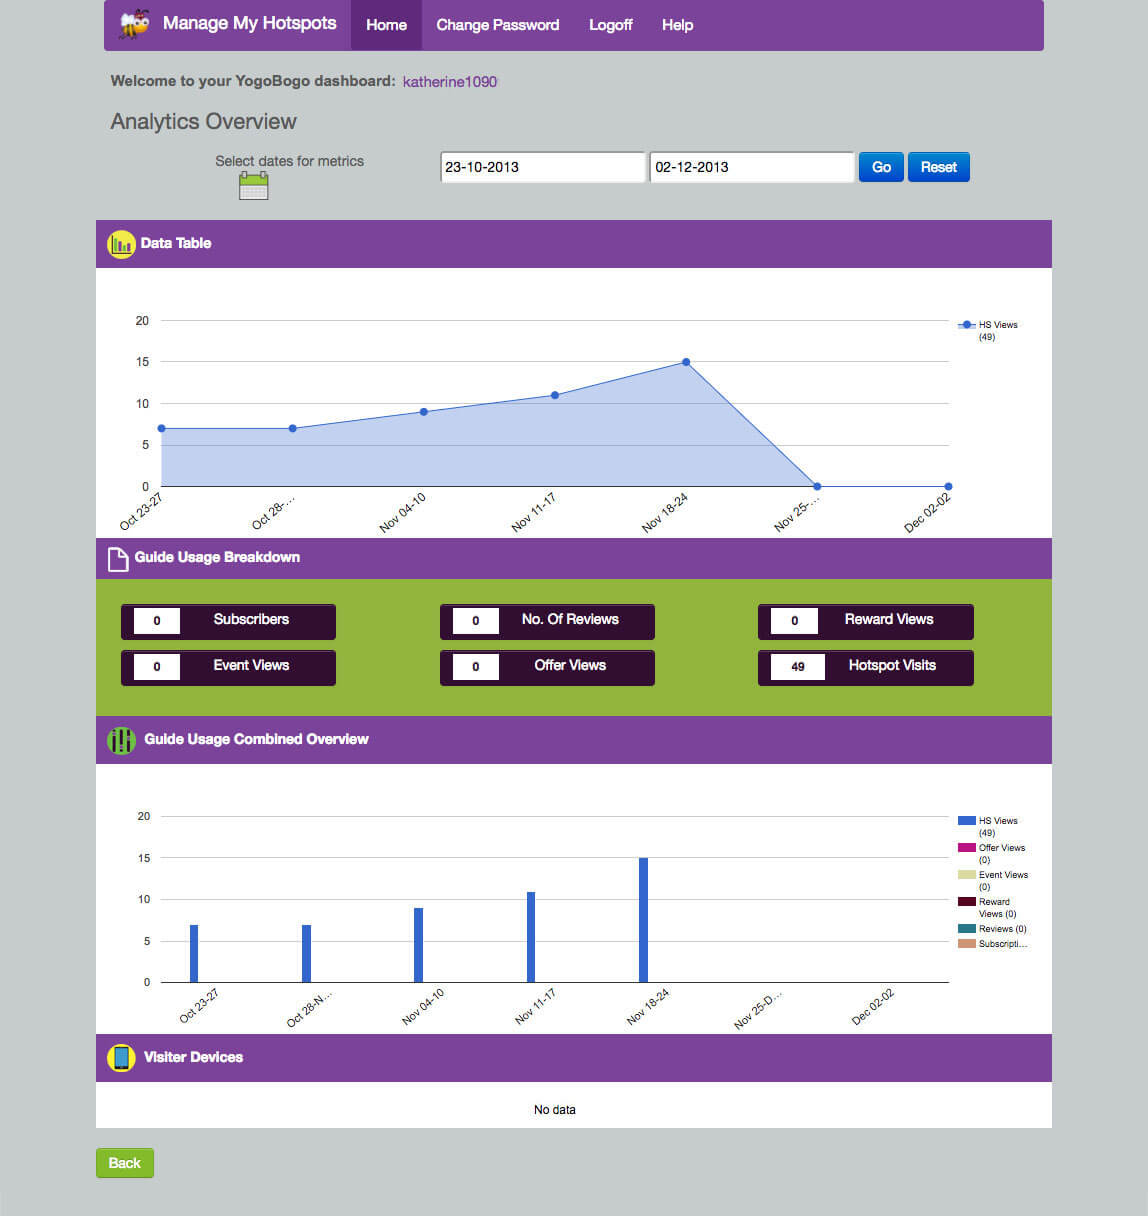
Analytics Overview: If you tapped on the 'View Analytics Chart' button you will get a screen that looks like the one below. Once again simply select the Date range you wish to view and then select one of the 6 views available under the 'Guide Usage Breakdown' title to view Subscribers, No. of Reviews, Reward Views, Event Views, Offer Views and HS views in a visual graph.
View & Manage Reviews
Click on the 'Manage Reviews' under Reviewer Data on the Home dashboard which will bring up a screen like the one below. This page displays all your reviews and ratings and allows to reply both publicly or privately through their registered email. You can also turn off any comments that contain vulgar or offensive messages as highlighted in the red No.1 section of this image. To reply publicly tap on the speech bubble in the reply column and if you have replied it will display that as in the red No.2 section that has a speech bubble with pen icon. Clicking on this icon displays your reply.

Add Picture Hotspots'
Step 1. Click on Add/Edit button under 'Manage my Picture Hotspots' on your Home page dashboard. This brings up a window that allows you to select the picture you want to add a picture HS to as highlighted in the image under No. 1. Simply move the image to where you want to add the HS to and then click on 'Add HS to Image' highlighted as No. 2 below . This will bring up red crosshairs over the picture (Note: hover your mouse over the picture picture to see the crosshairs highlighted as No. 3 below). Pinpoint the precise area of the picture that you want to add a HS to and a new window will open up - See Step 2.

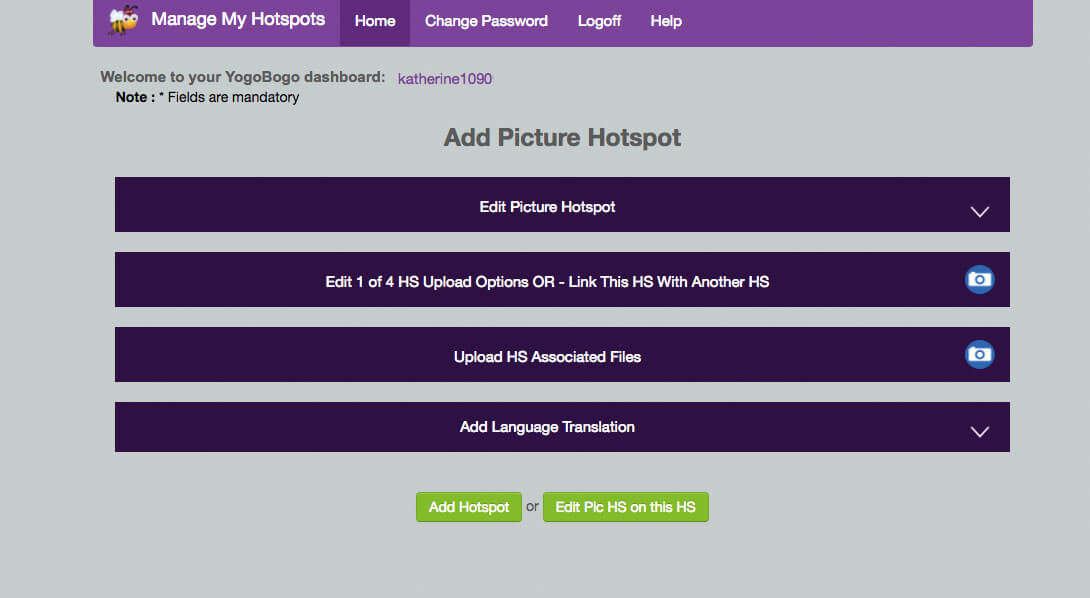
Step 2. This new window allows you to first of all add new text description for the new picture or panorama. Then you again select one of the four picture options e.g., add a series of still photos, panorama, or video. Note: if you add a video you can not then add a picture HS on top of that. You can also link it to an existing image you have already uploaded if you want to give the user a walk-through experience e.g. if you have a number of sections or levels that require the user to come back downstairs from top floor so that they can go to the bottom floor you can connect the top floor back to the middle floor so that the user can see go up and down or back and forth as they would in the real world scenario. Additionally you can also add further PDF files for this image as well so, if you are showing a banquet hall you may have a specific brochure and price list for that. Lastly you can again translate your description in any or all of the 6 different languages as per your main Hotspot if you choose.
If you want to add another Hotspot to this picture the click on the 'Edit Pic HS on this HS' or if you are done just click on the 'Add Hotspot' button.
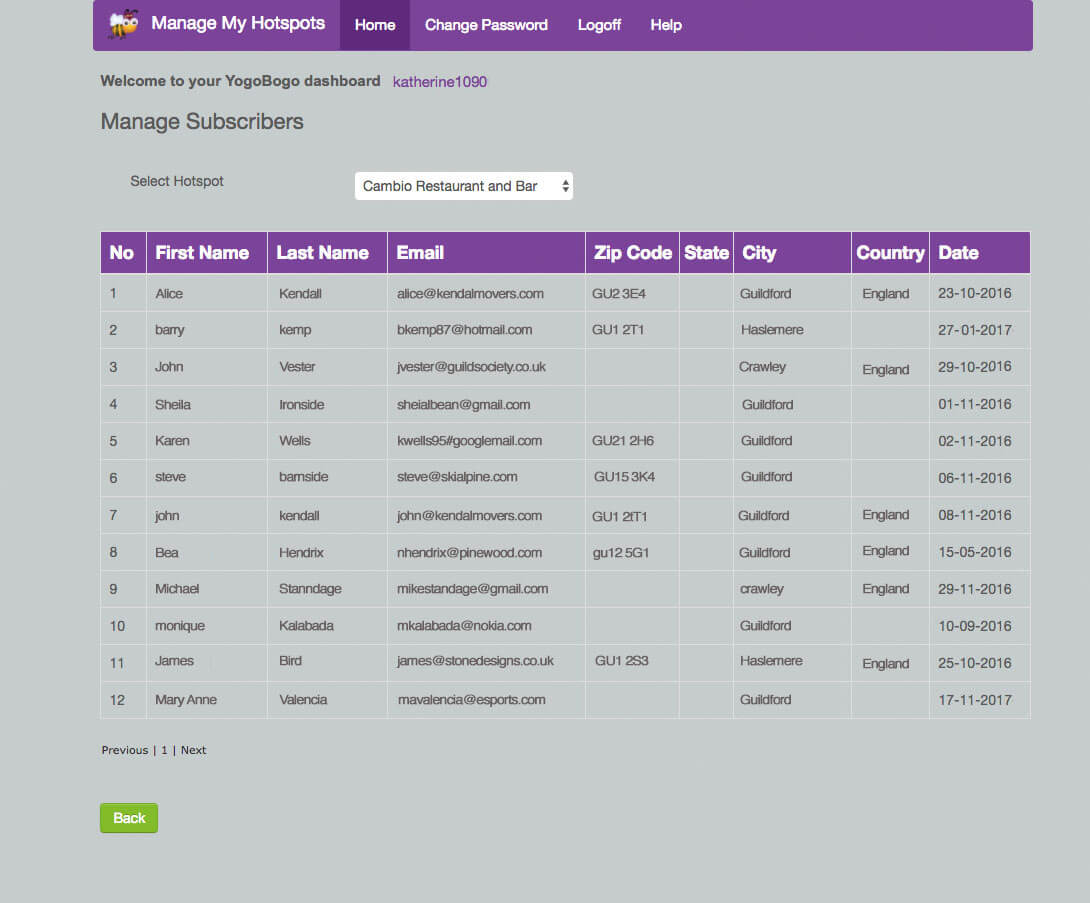
Manage Subscribers
Step 1. Click on 'Manage Subscribers' on your Home page dashboard to bring up your Subscribers window. From here you can view every customer that has following your alerts. Just select your Hotspot from the drop down menu and it will display the names, email addresses and some demographic information on every customers that is subscribed to you.